
Tacton CPQ is a powerful tool for managing complex product configurations, but sometimes a standard...
In the world of Configure, Price, Quote (CPQ) systems, ensuring the accuracy of configurations and pricing models is critical. As businesses scale and the number of configurations increases, manual testing becomes impractical. This is where automated test case generation comes into play, providing a scalable solution to maintain high-quality standards.
In this post, we'll explore how XML data from a CPQ system can be used to automatically generate test cases. We’ll walk through a real-world example where configuration data is parsed and transformed into structured test cases, ready for automated validation.
The Scenario
Imagine you’re working with a CPQ system that outputs configuration data in XML format. This data includes various parameters such as product options, pricing, and other critical settings. To ensure that each configuration is correct, you need to generate test cases that validate these settings against expected outcomes.
However, writing these test cases manually for every possible configuration would be a daunting task. Instead, we can automate this process by parsing the XML data and generating test cases programmatically.
Parsing XML Data
Let’s consider an XML response from a CPQ system that contains configuration details for different products:
<list limit="2" type="configuredproduct">
    <resource id="product12345">
        <attributes>
            <attribute name="required-parameters">
                <parameters>
                    <parameter step="Step1" name="FeatureX_field" value="OptionA" actualValue="OptionA" committed="false"/>
                    <parameter step="Step2" name="FeatureY_field" value="OptionB" actualValue="OptionB" committed="true"/>
                </parameters>
            </attribute>
        </attributes>
    </resource>
    <resource id="product67890">
        <attributes>
            <attribute name="required-parameters">
                <parameters>
                    <parameter step="Step1" name="FeatureZ_field" value="OptionC" actualValue="OptionC" committed="true"/>
                    <parameter step="Step2" name="FeatureW_field" value="OptionD" actualValue="OptionD" committed="true"/>
                </parameters>
            </attribute>
        </attributes>
    </resource>
</list>
This XML contains configuration details for two products, each with its own unique identifier (id). Each product has parameters that belong to different steps (Step1, Step2), and each parameter has an actualValue that we want to validate in our test cases.
Generating Test Cases
We can use a script to parse this XML directly in Postman, extract the relevant information, and automatically generate test cases. The script will iterate over each product, extract its configuration parameters, and structure these into test cases that can be executed by a test framework.
Here’s how the script works:
Step 1: Parse the XML
We use the xml2js library to parse the XML data into a JavaScript object, which allows us to easily navigate through the data structure.
Step 2: Extract Parameters
For each product (resource), we extract the id and the required-parameters. These parameters are grouped by their respective steps.
Step 3: Generate Test Cases
Using the extracted parameters, we generate test cases for each product. The actualValue of each parameter is used to create assertions within the test cases. The id of the product becomes the name of the test case, ensuring that each configuration is uniquely identified.
Step 4: Output the Test Cases
The script outputs the generated test cases in an XML format, which can then be fed into a test automation framework.
Example Script
Here’s an example script that automates this process:
// Import the xml2js library to parse XML
const xml2js = require('xml2js');

// Function to create the unit test XML for each resource
function createUnitTestXml(xmlString) {
    let finalXml = '';

    xml2js.parseString(xmlString, { explicitArray: false }, (err, result) => {
        if (err) {
            console.error('Failed to parse XML:', err);
            return;
        }

        const resources = Array.isArray(result.list.resource) ? result.list.resource : [result.list.resource];

        resources.forEach(resource => {
            const unitTestXml = [];
            const resourceId = resource.$.id;

            unitTestXml.push(`<unit-test application="Application" name="${resourceId}">`);
            unitTestXml.push(`    <units>`);
            unitTestXml.push(`        <play-safecookie>`);
            unitTestXml.push(`            <safecookie>`);

            if (resource && resource.attributes && resource.attributes.attribute) {
                const attributes = resource.attributes.attribute;
                let requiredParameters = attributes.find(attr => attr.$.name === "required-parameters");

                if (requiredParameters && requiredParameters.parameters && requiredParameters.parameters.parameter) {
                    const parameters = requiredParameters.parameters.parameter;
                    const steps = {};

                    // Group parameters by their step
                    parameters.forEach(parameter => {
                        if (parameter.$.committed === "true") {
                            const step = parameter.$.step;
                            const name = parameter.$.name;
                            const actualValue = parameter.$.actualValue;

                            if (!steps[step]) {
                                steps[step] = [];
                            }

                            steps[step].push({ name, actualValue });
                        }
                    });

                    // Get stepOrder from the global environment variable and split into an array
                    const stepOrderEnv = pm.globals.get("stepOrder") || "";
                    const stepOrder = stepOrderEnv.split(",").map(step => step.trim());

                    // Generate the XML following the predefined order
                    stepOrder.forEach(step => {
                        if (steps[step]) {
                            unitTestXml.push(`                <safe-step name="${step}">`);
                            unitTestXml.push(`                    <commits>`);

                            steps[step].forEach(commit => {
                                unitTestXml.push(`                        <committed name="${commit.name}">${commit.actualValue}</committed>`);
                            });

                            unitTestXml.push(`                    </commits>`);
                            unitTestXml.push(`                </safe-step>`);
                        }
                    });

                    // Handle steps that were not explicitly ordered (they will appear after ordered steps)
                    Object.keys(steps).sort().forEach(step => {
                        if (!stepOrder.includes(step)) {
                            unitTestXml.push(`                <safe-step name="${step}">`);
                            unitTestXml.push(`                    <commits>`);

                            steps[step].forEach(commit => {
                                unitTestXml.push(`                        <committed name="${commit.name}">${commit.actualValue}</committed>`);
                            });

                            unitTestXml.push(`                    </commits>`);
                            unitTestXml.push(`                </safe-step>`);
                        }
                    });
                }
            }

            unitTestXml.push(`            </safecookie>`);
            unitTestXml.push(`        </play-safecookie>`);
            unitTestXml.push(`    </units>`);
            unitTestXml.push(`</unit-test>`);

            // Combine this unit test XML into the final XML
            finalXml += unitTestXml.join('\n') + '\n';
        });
    });

    return finalXml;
}

// Use the createUnitTestXml function to generate the XML
const unitTestXml = createUnitTestXml(responseBody);

// Log the final unit test XML
console.log(unitTestXml);

// Optionally, set the generated XML as a variable to use in subsequent requests or scripts
pm.environment.set("unitTestXml", unitTestXml);
Please note that this script in postman requires two enviromental variables
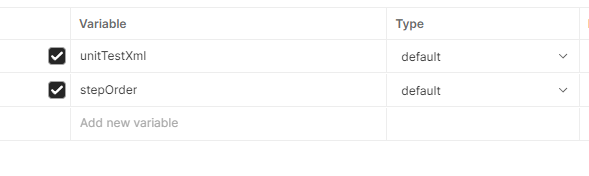
unitTestXml will give the output, stepOrder is a comma seperated list of the steps in the correct orderBenefits of Automated Test Case Generation
Scalability
As the number of configurations in your CPQ system grows, automated test case generation scales effortlessly. Each new configuration is automatically tested without requiring manual intervention.
Consistency
Automated generation ensures that each test case is created consistently, reducing the risk of human error. This consistency is critical for maintaining the quality of complex CPQ systems. This also ensures that the next release is in sync with what has been configured in CPQ over the last weeks.
Speed
Automation significantly reduces the time required to create and execute test cases, enabling faster releases and more agile development cycles.
Automating test case generation from CPQ configuration data is a powerful approach to ensure the integrity of your product configurations. By leveraging XML parsing and scripting, you can streamline the testing process, reduce manual effort, and maintain high-quality standards as your CPQ system evolves.
If you’re interested in implementing this in your CPQ environment, try adapting the example script provided and see how it can transform your testing workflow.
Happy automating!
If you need any support to get this working, please reach out and I'll help you get started.